Categories
Pathway

The Dirt on Hiring Landscape Grading Experts for Your Home

The Dirt on Hiring Landscape Grading Experts for Your Home

What Landscape Grading Contractors Do and Why It Matters

Landscape grading contractors change the shape of the ground around your house. They do this to control where rainwater flows. This is very important for your home.

What do landscape grading contractors do?

  • They slope the dirt to push water away from your house.
  • They fix wet lawns and muddy spots.
  • They get the ground ready for new patios, pools, or grass.
  • They put in drains and pipes to carry water away.
  • They pack the dirt down tight so it does not sink later.

Water can hurt your house. If your yard does not drain well, water can get into your basement or crawl space. Standing water can also bring thousands of mosquitoes in just a day or two. Bad grading is a big problem that gets worse every time it rains.

Grading is the best way to protect your home. It is not just about moving dirt. It is about planning where the water will go.

My name is Don Larsen. I am the boss of Saga Infrastructure. We help local construction companies across the country. This includes the landscape grading contractors who do this work. I know what makes a grading job good or bad. I want to help you avoid costly mistakes.

Infographic showing water flow on properly graded vs. poorly graded residential yard infographic

Simple landscape grading contractors glossary:

Why Your Yard Needs Professional Landscape Grading Contractors

When you look at your yard, you see grass and trees. But professional landscape grading contractors see slopes and paths. If these paths are wrong, your whole yard is in danger.

The biggest sign of bad grading is standing water. If your grass stays wet for days after it rains, you have a drainage problem. Water will collect in low spots. Then, it will leak toward your house. This water can get into cracks under your home. When water sits next to your house, it can crack the concrete foundation. Fixing a foundation can cost a lot of money.

Another problem is soil erosion. This is when rain washes your dirt away. Without good dirt, your plants cannot grow. In places like Florida or Arizona, heavy rain can wash away loose dirt very fast if the yard is not graded right.

Wet yards also bring bugs. A simple puddle can become a home for thousands of mosquitoes in just one or two days. Nobody wants a swamp in their yard.

To learn more about how slopes protect your land, read The Straight Dirt on Land Grading and Leveling. You can also check out The Essential Guide to Grading and Drainage Systems to see how drains work. Hiring Why You Need Professional Land Leveling Contractors is the best way to stop these problems early.

Grading vs. Leveling: What is the Difference?

Many people think “grading” and “leveling” are the same thing. But they are actually different. Knowing the difference helps you choose what your yard needs.

A professional using a laser level on a construction site

Here are the main words landscape grading contractors use:

  • Rough Grading: This is the first step. Workers use big machines to move lots of dirt. They make the basic shape of the yard. This helps water flow the right way.
  • Finish Grading: This is the final touch. Workers smooth out the top dirt. They pick up rocks and sticks. This gets the ground ready for grass or plants.
  • Land Leveling: This makes the ground completely flat. You need flat ground before you build a patio, pool, or driveway. Leveling makes things flat, while grading makes a slope.
  • Resloping: This means changing how steep a hill is. Workers move dirt from high spots to low spots. This stops dirt from washing away.

Packing the dirt down is very important. If you just throw loose dirt into a hole, it will sink when it rains. Workers pack the dirt down in thin layers. This keeps the ground strong and steady for a long time.

After the ground is packed, we add good topsoil. For a healthy lawn, we use about 4 to 6 inches of topsoil. This helps grass roots grow deep and strong.

Here is a simple table to show the differences:

Service Type Main Goal Typical Equipment Used Common Use Case
Rough Grading Shape main slopes Bulldozers, large excavators Preparing a new home site
Finish Grading Make a smooth surface Skid steers, hand rakes Getting ready for grass
Land Leveling Make a flat surface Laser levels, small tractors Building a new patio
Resloping Change a hill’s angle Skid steers, mini excavators Fixing a steep hill

For more tips on how to flatten your yard, read Leveling Up Your Landscape Without the Heavy Lifting. If you want to get ready for a new driveway, read From Dirt to Driveway Mastering Grading and Paving.

How Much Does Yard Grading Cost and How Long Does It Take?

How much does it cost to hire landscape grading contractors? The price depends on how big your yard is and how hard the job is.

Most homeowners pay between $1,216 and $4,356 to grade a yard. A small, simple yard will cost less. A big yard with lots of hills will cost more.

Most of the cost goes to pay for the workers and their big machines. Workers usually cost $25 to $50 per hour for each person. If you have two workers with machines, it might cost $50 to $100 per hour.

A few things can change the price:

  • Yard Size: A small area for a patio is cheaper than a huge yard.
  • Hills: If the workers have to cut into a steep hill, it takes more time and bigger machines.
  • Type of Dirt: Sandy dirt is easy to move but washes away fast. Clay dirt holds water and is very hard to dig.
  • Space: If your gate is too small for big machines, the job will take longer and cost more.

Most home projects do not take very long. Small yards take 1 to 3 days. Bigger yards take 3 to 7 days. But rain can stop the work. You cannot pack wet dirt, so rainy days will cause delays.

To learn more about prices, read How Much Does Land Grading Cost. If you are building a new house, read Why Site Prep for House Construction Is Your Most Important Step to see how grading fits your budget.

How to Choose the Best Grading Experts Near You

Picking the right worker is the most important step. If they do not understand water flow, they can make your problems worse. They might even send water toward your neighbor’s house. This can cause big arguments.

Heavy machinery operating on a residential lot for grading

When looking for landscape grading contractors, check for these things:

  • License: Make sure they have the right permits to do this work in your town.
  • Insurance: This protects you if they break something or if a worker gets hurt.
  • Local Knowledge: A local team knows your soil and weather. A team in Arizona knows about dry sand, while a team in Florida knows about heavy rain.

To start your search, check out local lists like Grading Contractors near Clermont, FL . You can also look at regional experts like Precision Land Grading in Plant City & Central Florida or Landscape Grading & Excavating Contractor Services for Texas. If you are in the Southwest, Grading Contractor | Phoenix, Scottsdale, Peoria, Glendale AZ is a great help. You can also read our guide on How to Find the Best Local Excavation Services Without Breaking a Sweat.

Questions to Ask Your Contractor

Before you hire a company, ask them these questions:

  1. Are you licensed and insured? (Always check this yourself.)
  2. Do you promise the dirt won’t sink? (A good contractor should guarantee their work for a year.)
  3. Will you call 811 before you dig? (They must mark water, gas, and power lines first.)
  4. Can I see a list of all costs? (Do not accept a single price without details.)
  5. How will you keep the dirt from washing away while you work? (They should use special fences to hold the dirt.)

Why You Should Not Do It Yourself

It might seem fun to rent a big machine and grade your yard yourself. But doing this alone is very risky.

Big machines are hard to drive. You can easily tip them over or hit your house. Also, without special tools, you might slope the ground the wrong way. If you send water toward your house instead of away from it, you will cause major damage.

Packing the dirt is also hard. Without the right tools, the dirt will sink later. In a few months, your wet spots and puddles will come back.

Diagram showing the risks of DIY grading vs the benefits of professional grading

To protect your home and save money, let the pros do it. Read Don’t Build Your Dreams on Shaky Ground to learn more about why good prep work matters.

Common Questions About Yard Grading

Here are some simple answers to common questions about yard grading.

How long does the work take?

For most homes, the work takes 1 to 3 days. If you have a big yard with lots of trees to clear, it can take 3 to 7 days. Rain can make the job take longer. If the ground is too wet, big machines will make a muddy mess.

Do I need a permit?

It depends on where you live. In many places, you need a permit if you move a lot of dirt. This is to make sure you do not flood your neighbor’s yard. A professional contractor will know the rules and get the permits for you.

How does the type of dirt change the job?

Different dirt acts in different ways. Clay dirt holds water and gets very heavy. Sandy dirt drains fast but washes away easily. Workers must pack sandy dirt down tight and add good topsoil so grass can grow. In dry places, the ground can be hard as rock. Workers need special tools to break through it.

If you have a steep yard, you might need a wall to hold the dirt. Check out Why Your Sloped Yard Needs a Retaining Wall Right Now and How to Properly Excavate a Hill for Your Next Retaining Wall to see how walls help.

Conclusion

At Saga Infrastructure, we know that good homes need a strong foundation. Our goal is to help local builders across the country. We partner with great local companies. We give them more tools and resources while keeping their local teams and names the same.

For example, we partnered with Foshee Construction in Florida. The owners, Kevin and Cindi Foshee, said:

“We wanted a buyer who cared about our team and our company. Saga was the perfect partner. They respected our team and made the process very easy.”

We are here to help you protect your home. We combine local skill with national strength to make sure your project lasts.

If you own a business and want a partner to help you grow, we want to talk to you.

Let’s start the conversation.

Categories
Blog

How to prep your lot for a new home

How to prep your lot for a new home

What You Need to Know Before Breaking Ground on Your New Home

Land preparation for building a house is the very first step of building a home. It happens long before you build any walls.

Here is a quick list of the main steps:

  1. Checking the land — look at the slope, water flow, and soil.
  2. Surveys and permits — find the property lines and get official permission.
  3. Testing the soil — make sure the dirt can hold a heavy house.
  4. Clearing the land — remove trees, bushes, and rocks.
  5. Grading and digging — flatten the ground and make water flow away from the house.
  6. Planning utilities — plan for power, water, and sewer lines.
  7. Packing the dirt — press the soil down tight so it is strong.

Many people do not realize how important this is. Preparing the land usually costs between $15,000 and $50,000. That is about 5 to 10 percent of the total cost to build the house. If you skip these steps, you can have big problems later. Fixing a bad site can cost 20 to 30 percent more later on.

For example, one builder skipped testing the soil on a $400,000 home. The house sank three inches on one side. It cost $87,000 to fix! That is a huge price for a mistake that was easy to avoid.

This guide will show you how to prepare your land the right way. You will save money and build a strong home.

I am Don Larsen, CEO of Saga Infrastructure. We help local contractors across the country do great work. I have worked on many big building projects. I know that preparing the land is the most important part of building a house. It is the foundation for everything else.

Site preparation timeline infographic: evaluation, permitting, clearing, grading, utilities, compaction, foundation-ready

Land preparation for building a house terms simplified:

The Essential Steps of Land Preparation for Building a House

When you look at empty land, you might just see a nice view. But builders look at the dirt. We must follow a strict plan before we start building.

Skipping steps in site prep is like putting on your shoes before your socks. It does not work. You will have to start over. Good site clearing and excavation turn wild land into a safe place for a house.

Why Soil Testing is Critical in Land Preparation for Building a House

You cannot tell if soil is good just by looking at it. Dirt that looks dry might have big problems underneath. Testing the soil is a must. It costs between $500 and $2,000. But it can save you from a $50,000 foundation failure.

A soil report tells us how strong the dirt is and how it moves.

  • Florida: The soil here has a lot of sand. Sand drains water well, but it can shift easily. We also have to watch out for deep holes that can cause sinkholes.
  • Texas: Much of Texas has clay soil. Clay acts like a sponge. It swells up when wet and shrinks when dry. This movement can crack concrete foundations easily.
  • Arizona: Here, we find a very hard layer of dirt called caliche. It is like rock. It is very hard to dig and needs big machines to break it.

Once we know the soil type, we pack it down. This is called compaction. The dirt under your house must be packed very tight. We do this in thin layers. Never just trust a builder who says the dirt is packed. Always ask for the official test results.

Surveying, Zoning, and Securing Permits

Before we cut down any trees, we must find the exact property lines. A land survey costs between $800 and $2,000. It shows where your land ends and where you cannot build.

Next are setbacks. These are local rules about how far your house must be from roads and neighbors. If you ignore these rules, the city might make you tear down your work.

You also need permits. These are official permissions from the city. They can cost from a few hundred dollars to over $20,000. If you clear a lot of land, you will need special permits to protect local water from mud and dirt.

Clearing, Excavation, and Rough Grading

Now, the big machines can start. First, we clear the land. This means removing trees, bushes, and rocks. We also must dig up tree roots and stumps.

If you leave tree stumps under your driveway or house, they will rot over time. This leaves empty holes underground. Then, your concrete will crack and sink.

Next, we shape the land. We dig dirt from high spots and use it to fill in low spots. This makes a flat area for the house. It also makes sure the ground slopes away from the house so water runs off.

Heavy machinery grading a flat residential lot in Texas

Managing Utilities, Drainage, and Site Differences

Preparing a lot is not just about the house. We also have to plan for water, power, and waste. This means we need good grading and drainage systems.

Planning and Installing Essential Utilities

If you build on wild land, you must bring in your own power, water, and sewer.

  • Power: If there are no power lines nearby, bringing them to your site can cost $10,000 or more. You will also pay $1,700 to $4,500 for temporary power during construction.
  • Water: If you cannot connect to city water, you must drill a well. This costs between $5,000 and $15,000.
  • Sewer: If there is no city sewer, you need a septic system. This costs between $6,000 and $20,000.

We must be very careful when digging. In the United States, workers hit underground lines 400,000 times a year. This can stop your project for weeks and cost a lot of money. Always call 811 to mark underground lines before you dig.

Designing Drainage and Grading to Protect Your Foundation

Water always finds a way in. If water flows toward your house, you will have big problems. Poor drainage is the main cause of wet basements and cracked foundations.

To prevent this, we slope the ground away from the house. The ground should drop at least one-quarter inch for every foot. This slope should go out for at least ten feet.

We also dig shallow ditches called swales. These swales guide rainwater safely away. We use special fences to keep loose dirt from washing onto your neighbor’s yard.

How Site Prep Differs for Flat, Wooded, and Sloped Lots

Every piece of land is different. The type of lot you have changes how we prepare it.

  • Flat Lots: These are the easiest and cheapest to prepare. But even flat lots usually have small bumps. They also need careful planning so water does not puddle.
  • Wooded Lots: Cutting down trees takes a lot of work. It can add $5,000 to $15,000 to your budget. We want to save nice, mature trees. Mark the trees you want to keep with bright orange tape so they do not get hurt.
  • Sloped Lots: Building on a hill requires a lot of digging. We often have to build strong walls to hold the dirt in place. These lots also need smart plans to handle fast-moving rainwater.

Cost Breakdown and Timelines for Site Prep

Preparing your land costs a lot of money and takes time. Knowing the real costs of site prep helps you plan your budget.

Budgeting for Land Preparation for Building a House

Costs can change a lot depending on your land. Normal digging is cheap. It costs about $5 to $15 per cubic yard. But if we hit hard rock, we have to use heavy hammers. This can cost $50 to $200 per cubic yard. That is a huge jump in price!

Here is a simple guide to typical costs:

Lot Type Description Estimated Site Prep Cost
Flat & Cleared Easy to reach, nearby utilities, very few trees $10,000 – $20,000
Standard Residential Some trees to clear, minor grading, normal utilities $15,000 – $35,000
Sloped or Wooded Lots of trees, lots of digging, no utilities nearby $40,000 – $60,000+
Challenging/Remote Steep hills, hard rock, very long utility lines $75,000+

Understanding the Site Prep Timeline

How long does it take to get land ready? For a flat lot, the physical work might only take 2 to 3 weeks.

But if we have to clear many trees, break rock, or run long power lines, it can take 6 to 8 weeks.

Getting permits from the city is the biggest wildcard. It can take from 4 weeks to several months. Bad weather can also slow things down. Heavy rain or extreme heat can stop the work completely.

Choosing the Right Contractor and Avoiding Costly Mistakes

Preparing land is a technical job. You need to find the best local excavation services and avoid common mistakes.

Common Site Prep Mistakes to Avoid

Most big mistakes are easy to avoid. Here are the most common ones:

  • Skipping the Soil Test: Trying to save $1,000 on a soil test can cause your house to sink. This can cost tens of thousands of dollars to fix later.
  • Bad Drainage Planning: If you do not plan where rainwater will go, you will get puddles and leaks in your basement.
  • Forgetting to Call 811: Hitting a gas or power line is very dangerous. It will stop your project and cost a lot of money.

Properly compacted building pad ready for foundation pouring

How to Hire a Qualified Excavation Contractor

Do not just hire the cheapest contractor. Look for a team with local experience.

Make sure they have a license and insurance. Ask to see their past work. A good contractor will gladly show you their work and explain how they pack the soil and handle water.

This is where Saga Infrastructure can help. We partner with the best local construction teams. We combine their local knowledge with our national resources. This ensures your land is prepared the right way.

Frequently Asked Questions about Site Preparation

How long does land preparation typically take?

For most normal lots, the physical work takes 2 to 4 weeks. But when you add soil testing, surveying, and getting permits, the whole process takes 1 to 2 months.

Do I need permits for land clearing and site preparation?

Yes. In almost all areas, you need permits before you can cut down trees or move dirt. If your land is near water or protected areas, you may need special environmental permits too.

What happens if soil conditions are worse than expected?

If the soil is weak, we can dig it out and replace it with strong dirt. In areas with clay, we might need to change the foundation design. We can use extra steel or deep supports to keep the house safe.

Conclusion

Preparing your land is the most important step of your build. It protects your investment and keeps your home strong for a long time.

At Saga Infrastructure, we work with the best local builders to get great results. We help you from the very first shovel of dirt to the final grade.

If you are ready to prepare your land, let’s talk. Partner with Saga Infrastructure Solutions and build your dream home on a foundation you can trust.

Categories
Blog

How to Stop Your Pond Banks from Going Downhill

How to Stop Your Pond Banks from Going Downhill

How to Stop Your Pond Banks from Going Downhill

Why Pond Banks Are Worth Protecting

Pond bank stabilization means making the edges of a pond strong. This stops dirt from washing away. It keeps the water clean and the pond safe. Here is a quick look at what works:

Method Best For Difficulty
Plants Small waves Easy
Coconut logs Medium waves Medium
Rocks Big waves Hard
Concrete mats Steep hills Hard
Mix of both Most ponds Medium

A pond looks nice, but the edges do a big job. They hold the water and the land together. But water is very strong. Rain and waves hit the dirt every day. If you don’t fix it, the bank can fall apart in big chunks.

By April 2026, heavy rain and old ponds have made fixing erosion very important for everyone.

The good news is that you can stop the damage. You can use plants or rocks to keep the dirt in place.

I am Don Larsen, the head of Saga Infrastructure. We help people fix their ponds and land. In this guide, I will show you how to keep your pond banks from falling down.

Infographic showing the cycle of pond bank erosion: rainfall runoff, wave action, soil loss, bank slumping, and

Pond bank stabilization helpful reading:

Why Pond Banks Fail: Causes and Signs

To fix a pond, we must know why it is breaking. Water is very powerful. Even calm water is always working against the dirt.

Waves and Rain Wind makes waves. These waves hit the shore and pull dirt into the pond. This is called “undercutting.” Also, when it rains, water flows down the hills. If the grass is thin, the water takes the dirt with it.

Water Levels Changing In places like Florida or Texas, water levels go up and down. When the water drops fast, the wet dirt on the bank gets heavy. It can slide right into the pond.

People and Animals Walking on the bank can hurt the grass. Animals like muskrats also cause trouble. They dig holes that make the bank fall in.

The Type of Dirt Some dirt is weak. Clay gets heavy when wet. Sand washes away very fast. Knowing your dirt is the first step. You can learn more from Expert Insights on Pond Bank Stabilization and Erosion Control by PondMedics.

Signs of Trouble

Look for these signs that your bank is failing:

  • Roots Showing: If you see tree roots in the air, the dirt is gone.
  • Sliding Dirt: The bank looks like it is melting into the water.
  • Overhangs: The dirt under the edge has washed away.
  • Muddy Water: If the pond is always muddy, the banks are falling in.
  • Deep Grooves: Rain has carved paths into the hill.

Checking the Damage and Planning

Before you start, look at your land. A good plan helps the fix last a long time.

The Hill Slope How steep is the bank?

  • 1:1 Slope: Very steep. This will likely fail. It needs big rocks or concrete.
  • 3:1 Slope: This is common. You can mow it, but it needs good grass.
  • 6:1 Slope: This is the best. It stops waves from eating the bank. It costs a little more to build, but it saves money later.

Looking at the Bank Walk around the pond. Are the holes in one spot or everywhere? You should also test the dirt. If the dirt is weak, you will need to fix it more often. For more help, see our Step-by-Step Guide to Erosion Control Solutions.

How Bad Is It?

  • Small: Just a little dirt is washing away. You can fix this with plants.
  • Medium: Small chunks are falling off. You might need coconut logs.
  • Bad: Big sections are falling in. You need a pro to help with rocks.

Natural Ways to Fix Your Pond

At Saga Infrastructure, we like using nature. These ways look pretty and help birds and fish.

Using Plants

The best way to protect a pond is with living plants. Their roots hold the dirt like a net.

  • Deep-Root Grass: These grasses have roots that go deep into the ground.
  • Water Plants: Planting grass in the water helps break up waves.
  • Buffer Zones: Don’t mow the grass right to the edge. Leave a few feet of tall plants to stop rain from washing dirt away.

Mixing Nature and Tools

Sometimes plants need help. We can use tools and plants together.

  • Coconut Logs: These are logs made of fiber. We put them at the water’s edge. You can plant things inside them. As the log rots away, the plant roots take over.
  • Mesh Bags (SOX): We fill big mesh bags with dirt and put them on the bank. You can grow grass right through the mesh. It makes a very strong wall.
  • Rock and Garden: We put down rocks and then fill the gaps with dirt and plants. It is strong and looks like a garden.

Comparing Ways to Fix the Bank

Feature Plants Only Mix (Logs/Mesh)
Cost Low Medium
Looks Very Pretty Pretty
Fast Fix Slow Fast
For Animals Great Great

Using Rocks and Strong Materials

If the water is too rough, you need “Hard Armor.” This is for very bad erosion.

Riprap (Rocks) Riprap is a layer of big rocks. You must put a special landscape cloth down first. This cloth lets water through but keeps the dirt in place. Usually, we put a 3-foot wide path of rocks along the water. This costs about $8.75 for every foot. You can learn more here: Don’t Get Washed Away: The Ultimate Riprap Erosion Defense.

Wire Baskets These are metal baskets filled with rocks. They make very strong walls but cost more money.

Concrete Mats These are mats made of concrete blocks. They come in rolls and are fast to put down. Grass can grow through the holes. You can even mow over them!

Installation of riprap over a geotextile fabric liner along a pond bank to prevent erosion - pond bank stabilization

Other Tools

  • Landscape Cloth: This cloth helps the bank last 5 years longer. It costs about $3.80 per foot.
  • Straw Blankets: These are pinned over new grass seeds. They keep the seeds from washing away until they grow.
  • Dirt Fences: These are used during work to keep mud out of the pond.

How to Install Rocks

  1. Check for Pipes: Call before you dig so you don’t hit a power line.
  2. Clean Up: Remove old trees and trash.
  3. Shape the Bank: Make the hill less steep.
  4. Lay the Cloth: Put down the special landscape fabric.
  5. Add Rocks: Place the rocks or mats on top.

Taking Care of Your Pond and Costs

Fixing the bank is not a one-time job. You must take care of it so it stays strong.

Easy Care

  • Mowing: Don’t cut the grass too short near the water!
  • Animal Control: Watch for muskrat holes. Fill them fast.
  • Clean Up: Pick up branches and trash.
  • Check Often: Look at the banks after a big storm.

Cost of Fixing Early vs. Late

Waiting until the bank falls is very expensive. Fixing a broken pond can cost a lot of money!

  • Fixing Early: Using cloth and plants now is cheap.
  • Fixing Late: Using big machines to move mud and rebuild walls is very pricey.

To learn more about land care, see The Essential Guide to Grading and Drainage Systems.

Professional Fixes and Pipes

Sometimes the problem is a broken pipe under the ground.

  • New Pipes: We take out old, rusty pipes and put in new ones.
  • Siphon Pipes: These can be put in without draining the pond.
  • Pipe Lining: We can slide a new pipe inside an old one.
  • Removing Mud: If the pond is full of dirt from the banks, we use machines to scoop it out.

Common Questions

What are the best plants for a pond bank?

Local plants with deep roots are best. Avoid regular lawn grass right at the edge. Its roots are too short to hold the wet dirt.

How much does it cost to put rocks on a pond bank?

A 3-foot path of rocks costs about $8.75 per foot. If you add the special cloth underneath, it costs about $11.50 per foot.

When should I call a pro?

Call a pro if big chunks of the bank are sliding into the water. Also call if the bank is too thin to drive a mower on, or if you see water leaking through the hill.

Conclusion

Your pond is important. Whether it is for fishing or for your neighborhood, the banks keep it safe.

At Saga Infrastructure, we want to protect what you have built. We work with local teams to help fix your land. We don’t just move dirt; we take care of the land for everyone.

Don’t wait until your pond bank is gone. Let’s start the conversation today. We can help you keep your pond strong for a long time.

Categories
Pathway

Why You Need Professional Land Leveling Contractors

Why You Need Professional Land Leveling Contractors

Why You Need Professional Land Leveling Contractors

What Land Leveling Contractors Actually Do (And Why It Matters)

Land leveling contractors are workers who make bumpy ground flat. They prepare the dirt for farms, houses, and roads. If you need to grow crops or build a new house, you need a flat surface. A good contractor makes sure the job is done right so you do not have problems later.

Quick answer: What do land leveling contractors do?

  • Prepare farm fields so water flows evenly and crops grow better
  • Flatten building sites so foundations are strong and water drains away
  • Move dirt using big machines with GPS and lasers
  • Stop erosion so rain does not wash the dirt away
  • Help build roads and other public projects

If land is not flat, bad things happen. Water pools in big puddles. Buildings can crack. Crops do not get the right amount of water. Dirt washes away. Getting the land flat at the start saves you money and time later.

These workers do not just use a simple tractor. They have years of practice. They use high-tech tools like GPS to know exactly how much dirt to move and where to put it.

I am Don Larsen, the head of Saga Infrastructure. We help great local construction companies do their best work. I know what makes a contractor great. In this guide, I will help you learn about land leveling so you can make a good choice.

Infographic showing the land leveling process from site survey to final grade with key benefits infographic

Must-know land leveling contractors terms:

What is Land Leveling and How Does It Differ From Grading?

Many people think “land leveling” and “land grading” are the same thing. They are similar, but they have different goals and use different tools.

graded construction site showing slope creation and flat surfaces

Land leveling means making the ground very flat or giving it a tiny, even slope. Imagine a big, flat farm field. The goal is to make the dirt smooth. Workers cut down high bumps and fill in low holes. This stops water from pooling in one spot.

Land grading means shaping the land to control where water flows. It is not about making things flat. Instead, it creates slopes to guide water away from homes, roads, and buildings so they do not flood.

Here is a simple way to see the difference:

Feature Land Leveling Land Grading
Main Goal Make a flat, smooth surface. Shape slopes to control water flow.
Best For Farms, lawns, and sports fields. House foundations and roads.
Tools Used Laser scrapers and GPS tractors. Bulldozers and excavators.
Water Plan Helps water soak in evenly. Sends water away from buildings.

To learn more about how these two jobs work together, read our guide on The Straight Dirt on Land Grading and Leveling.

Both jobs require knowing about different types of soil. Sandy soil in Florida behaves differently than hard clay in Texas or dry dust in Arizona. Professional land leveling contractors know how to work with the local dirt so the ground stays flat.

Core Services Provided by Professional Land Leveling Contractors

Professional land leveling contractors do many jobs to get your land ready. They do not just push dirt around. They plan and measure carefully so your project has a strong start.

Here are the main services they offer:

  • Site Prep: Clearing away trees, rocks, and trash to make the ground ready.
  • Moving Dirt: Shoveling huge amounts of dirt from high spots to low spots.
  • Rough and Final Grading: Shaping the basic slopes first, then smoothing the top dirt for grass or roads.
  • Water Drainage: Making paths and slopes so rainwater flows away safely.
  • Ponds and Basins: Digging big holes to hold extra water during heavy storms.

To see how these services help prepare a site, read Everything You Need to Know About Heavy Earthmoving and Site Development.

Why Agricultural Projects Rely on Land Leveling Contractors

Farms need water to grow food. If a field is bumpy, water will pool in low spots and drown the plants. The high spots will stay dry and thirsty. This wastes water and ruins crops.

Farmers use land leveling to save water and grow more food. Leveling a field helps to:

  • Water Crops Evenly: Water flows smoothly down the rows so every plant gets a drink.
  • Save Water: Farmers do not have to waste water trying to reach dry high spots.
  • Grow More Food: Healthy, evenly watered soil makes crops grow better.

To learn how to set up these water systems, read The Essential Guide to Grading and Drainage Systems.

How Construction and Public Works Benefit from Land Leveling Contractors

For houses and roads, flat ground is a must. If the dirt under a concrete floor is not flat and packed tight, the concrete will crack and break.

Contractors do important work for buildings and roads:

  • Strong Foundations: Making flat, hard dirt pads for houses and shops.
  • Road Bases: Smoothing the dirt before pouring asphalt or concrete.
  • Erosion Control: Creating slopes so rain does not wash away roads and parks.

In Florida, the soil is wet and sandy. Contractors like Foshee Construction – Sitework, Grading & Utility Installation | Florida know how to work with this tricky soil. Whether you need help with a site in Minneola or need Clermont excavation – Slope in Land Grading , pros make sure your project starts on safe ground.

To see how good dirt work leads to great roads, read From Dirt to Driveway: Mastering Grading and Paving.

Advanced Equipment and Precision Technology

Years ago, workers leveled land by just looking at it. Today, professional land leveling contractors use high-tech tools to get the ground flat within a fraction of an inch.

GPS-guided scraper leveling soil on a construction site

Here are some of the cool tools they use:

  • GPS Machines: Tractors and bulldozers connect to satellites. The computer moves the blades up and down automatically to match a 3D map of the project.
  • Laser Levels: A laser light shoots across the field. Receivers on the machines read the light to keep the blades perfectly straight.
  • Heavy Rollers: These giant, heavy wheels pack the dirt down tight so it does not sink later.

These tools make the job faster and use less fuel. They also make the ground much flatter than a human could do alone. If you want to learn how to fix a small yard without big machines, read Leveling Up Your Landscape Without the Heavy Lifting.

Frequently Asked Questions About Land Leveling

Moving dirt can seem confusing. Here are answers to common questions about hiring land leveling contractors.

Why should I hire a professional instead of doing it myself?

It might seem easy to rent a small tractor and level your yard yourself. But doing it yourself can cost more if things go wrong.

First, big machines can tip over, which is very dangerous. Also, hitting buried pipes or wires can cause big problems. Second, you need special tools to get the slopes right. If you make a mistake, water could flood your house.

Finally, pros have heavy rollers to pack the dirt. If you do not pack the dirt, it will sink the first time it rains, and your yard will be bumpy again. If you need to dig a hill, read How to Properly Excavate a Hill for Your Next Retaining Wall.

How do I choose the right contractor for my project?

Finding the right partner is very important. Here is what to look for:

For a simple checklist, read our guide on how to Hire the Best Land Grading Companies Near You.

What factors affect the cost, timeline, and regional availability of land leveling?

Every piece of land is different. That means every job is unique.

diagram showing the key factors that affect land leveling costs and project timelines

Here is what changes the price and time:

  • Size of the Land: Bigger yards take more time and bigger machines.
  • Trees and Rocks: If the land has lots of trees or rocks, workers must clear them first.
  • Type of Soil: Hard clay or wet sand takes more work to flatten and pack.
  • Weather: Rain makes mud, and you cannot flatten mud. This causes delays.
  • Permits: Some towns require official permission papers before you can move dirt.

Most small yard projects take 1 to 3 days once the machines arrive. Big farm or business projects can take a few weeks. To learn more about prices, read How Much Does Land Grading Cost.

Conclusion

Land leveling is more than just moving dirt. It is about building a safe, strong foundation for crops, homes, and roads.

At Saga Infrastructure, we help local construction companies do great work. We buy and support regional contractors, like Foshee Construction in Florida. We give them tools and money to grow, but we keep their local names and teams. This means you get local experts backed by a strong national company.

If you own a construction business and want to protect your company’s future, we would love to talk to you.

Let’s start the conversation and visit Saga Infrastructure Business Owners today.

Categories
Pathway

Don’t build your dreams on shaky ground

Don’t build your dreams on shaky ground

Don’t build your dreams on shaky ground

Why Getting Building Construction Site Preparation Right Makes or Breaks Your Project

Building construction site preparation is how we get raw land ready for a new building. It includes testing the soil, measuring the land, clearing trees, moving dirt, and planning for water and power lines. All of this must happen before we pour any concrete.

Here are the main steps:

  1. Soil testing – Find out if the dirt is strong enough to hold a building.
  2. Surveying and permits – Mark the property lines and get legal permission to build.
  3. Site clearing – Remove trees, plants, rocks, and old buildings.
  4. Excavation and grading – Dig and level the ground so it is flat and slopes the right way.
  5. Soil compaction – Pack the dirt down tight so it does not sink.
  6. Erosion and drainage controls – Keep dirt from washing away when it rains.
  7. Utility coordination – Find buried pipes and wires and plan new connections.

Many people think building starts when the walls go up. But the most important work happens first. If you do not prepare the ground, the project can fail.

Bad site prep causes one-quarter of all construction delays and accidents. If you skip this work, the foundation can crack. Fixing a cracked foundation can cost $50,000 to $200,000. A simple soil test costs only $2,000 and can stop this from happening.

The ground must hold up the whole building. If the ground is not ready, the building will not stand.

I am Don Larsen, the head of Saga Infrastructure. I have spent my career working in construction. I know that site prep is the key to finishing projects on time and on budget. I will explain each step of this process so you can see how it works.

Site preparation lifecycle infographic showing 7 steps from soil testing to final compaction infographic

Building construction site preparation vocabulary:

What is Building Construction Site Preparation and Why is it Critical?

Simply put, building construction site preparation is how we get a piece of land ready for a building. It makes the ground safe, strong, and legal. Good site prep can cut building delays by almost one-third. It can also lower the total cost by 15% to 20%.

Why is this so important? First, it keeps the building safe. Testing and packing the soil can prevent many foundation failures. If you skip these steps, your walls can crack and your doors might not close. We explain this in our guide on Why Site Prep for House Construction Is Your Most Important Step.

Second, it saves you money. When you prepare the ground well, you avoid surprise problems that cost a lot to fix. Whether you are building a small shed or a big store, you need to know The Groundwork Essentials for Your New Construction Project.

At Saga Infrastructure, we work with building teams in Florida, Texas, and Arizona. We know how different soils behave. Arizona has dry clay, and Florida has wet sand. Our local teams know how to make sure your site is built to last.

The Essential Steps of Building Construction Site Preparation

Preparing a site is a step-by-step job. You must do the steps in the right order. If you do them out of order, you will waste time and money. For example, you should never dig before you find the buried power lines.

Here is how the steps flow in order:

Diagram showing the sequential flow of site preparation phases

Before we start, we need a clear plan. For big projects, we use our Ready, Set, Build: A Complete Checklist for Commercial Site Preparation to make sure we do not miss anything. Let us look at the main phases.

Phase 1: Geotechnical Soil Testing and Surveying in Building Construction Site Preparation

Every good project starts with facts. Before big trucks arrive, we must test the soil and map the land.

Geotechnical Soil Testing

An engineer will drill into the ground to get dirt samples. They test these samples in a lab to find out:

  • Soil Type: Is the dirt made of clay, sand, or gravel?
  • Strength: Can the dirt hold up a heavy building?
  • Water Level: How close is water to the surface of the ground?

This step is very important. Some soils are strong and safe. Other soils, like wet sand, can cave in easily. If you do not test the soil, you might build the wrong kind of foundation. You can learn more about this in the Basics of Site Work manual.

Site Surveying

At the same time, surveyors use special tools to map the land. They find:

  • Property Lines: To make sure you do not build on your neighbor’s land.
  • Slopes: To see where the land rises and falls.
  • Building Spot: To mark exactly where the building will go.

These tests cost a little bit of money now, but they save you from huge mistakes later. To see how these tests fit into your budget, read How Much Does Site Prep Really Cost?.

Phase 2: Clearing, Excavation, and Grading for Building Construction Site Preparation

Once the tests are done, big machines come in to change the land.

Heavy machinery grading dry soil on a clear site

Land Clearing

This step means removing everything in the way. We clear out trees, plants, rocks, and old buildings. We must dig up the roots too. If you leave roots in the ground, they will rot. This leaves empty holes under the dirt, and the ground will sink. You can read about the rules for this in the ARCAT, Inc. Site Clearing Specification .

Excavation and Grading

Next, we move the dirt. We cut down high dirt piles and fill in low spots. This makes a flat pad for the building. Even land that looks flat usually has high and low spots that we must fix.

Soil Compaction

After we move the dirt, we must pack it down. We spread the dirt in thin layers. Then, heavy roller trucks drive over it to squeeze out the air. This makes the dirt very tight and strong.

If we do not pack the dirt, the building will sink and crack. To learn more about how we move dirt, read Everything You Need to Know About Heavy Earthmoving and Site Development.

Managing Environmental Factors, Permits, and Drainage Systems

Site prep is not just about moving dirt. It is also about managing water and following the law. You must plan for these things from the very start.

Erosion Control and Stormwater Management

When you clear plants off the land, the dirt is bare. Rain can easily wash the dirt away. This dirty water can clog drains and hurt local rivers.

To stop this, we use simple tools before we start digging:

  • Silt Fences: Fabric fences that let water pass through but stop the dirt.
  • Ponds: Temporary pools that catch rainwater so the dirt can settle to the bottom.
  • Drain Covers: Guards placed over street drains to keep dirt out.

To learn how to protect your site, read our Step-by-Step Guide to Erosion Control Solutions. You can also read The Essential Guide to Grading and Drainage Systems. To see a checklist for this work, look at the Excavation SOW: Soils, Shoring, Dewatering & Utility Locates Checklist .

Permitting and Utility Coordination

You cannot just start digging because you own the land. You must get permission and talk to utility companies.

  • Permits: You need official papers from the city to clear trees and move dirt.
  • Utility Lines: Hitting a buried gas or power line is very dangerous. It happens a lot. You must call 811 a few days before you dig. Workers will come and mark where the pipes and wires are hidden.

For a full list of rules and costs, check out the Site Preparation Guide 2026: Steps, Costs & Expert Checklist .

Essential Equipment and Safety Measures on Site

Site prep is big, dangerous work. It takes large machines and strict safety rules to keep everyone safe.

Workers wearing hard hats and safety vests on a site

Heavy Machinery Selection

Using the right machines makes the job go much faster. Good machines can make the work run much better. Here are the main tools we use:

  • Excavators: Big shovels used to dig deep holes and trenches.
  • Bulldozers: Strong tractors with flat blades to push dirt and rocks.
  • Graders: Machines with long blades used to make the ground perfectly flat.
  • Compactors: Heavy rollers used to pack the dirt down tight.

To see how these machines work together, read From Dirt to Driveway: Mastering Grading and Paving.

Digging in soft dirt is cheap and fast. Digging through hard rock is slow and costs much more.

Excavation Type Common Equipment Used Average Cost Range (per cubic yard)
Standard Soil Excavation Wheeled/Tracked Excavators, Backhoes $5 – $15
Rock Excavation Heavy Excavators with Rippers, Hydraulic Breakers $50 – $200

Site Safety and Shoring Protocols

Safety is our number one rule. Digging deep holes is risky, so we follow strict safety laws:

  • Trench Safety: If a ditch is deeper than 5 feet, we must use metal boxes or wood braces to keep the walls from falling in.
  • Soil Checks: A trained person must check the dirt every day to make sure it is safe.
  • Safety Gear: Everyone on the site must wear hard hats, bright vests, and steel-toed boots.

To learn more about how we keep sites safe and flat, read The Straight Dirt on Land Grading and Leveling.

Common Challenges in Site Preparation and How to Mitigate Them

Even with a good plan, the ground can surprise you. You must know how to handle these surprises so you do not run out of money. To see how these problems affect your costs, read How Much Does Land Grading Cost?.

Handling Unsuitable Soils and High Water Tables

In Florida, you will often find water close to the surface. In Texas and Arizona, the clay soil can swell up when wet and shrink when dry.

  • Soil Mixing: If the dirt is too weak, we can mix in cement or lime to make it strong.
  • Water Pumps: If water fills the hole we dug, we use pumps to suck the water out so we can work.
  • New Dirt: If the native dirt is too bad, we dig it up and bring in good, clean dirt from somewhere else.

Managing Unexpected Underground Obstacles

Sometimes when you dig, you find old concrete, forgotten pipes, or giant rocks.

  • Planning Meetings: We meet with utility workers and engineers before we dig to map out any hidden dangers.
  • Extra Budget: We always keep extra money in the budget. This way, if we find a giant rock, we can pay to remove it without stopping the project.

Frequently Asked Questions About Preparing a Construction Site

How long does the site preparation process typically take?

For a flat yard with only a few trees, it takes 2 to 3 weeks. For a big commercial site with lots of rocks, water, and pipes, it can take 6 to 8 weeks or more.

Why is soil testing so important before building?

Soil testing tells us if the ground can hold up your building. If you do not test the soil, the building could sink and crack. Fixing a cracked building can cost up to $200,000.

Do I need permits for land clearing and grading?

Yes. Most cities make you get permits before you cut down trees, move dirt, or change how water flows. If you build without permits, the city can fine you and stop your project.

Conclusion

A building is only as strong as the ground under it. Rushing through building construction site preparation to save money is a bad idea. It is a risk that is not worth taking.

At Saga Infrastructure, we help local building companies grow. We partner with great regional teams, like Foshee Construction in Florida. We give them the money and safety tools they need while keeping their local name and team.

When you work with us, you get a local team you can trust, backed by a strong national network.

If you want to grow your building business, or if you need a partner for your next project, let us build the future together.

Let’s start the conversation.

Categories
Blog

Hire the Best Land Grading Companies Near You

The Ultimate Guide to Paving Contractors in Florida

Hire the Best Land Grading Companies Near You

Why Finding the Right Land Grading Contractors Near Me Matters

If you are looking for land grading contractors near me, here is a quick way to start:

  1. Find local workers who have a license, insurance, and good reviews.
  2. Ask to see photos of their past work and talk to their past clients.
  3. Get at least three price quotes in writing before you choose.
  4. Make sure they know your local soil, rules, and permits.
  5. Ask about their schedule, warranties, and how they fix water flow.

A bumpy yard or bad water drainage is a big problem. It can ruin your house. Water can pool by your walls, wash away your dirt, and cost a lot of money to fix. A good grading job stops these problems before they start.

Most people pay between $1,216 and $4,356 to level a yard. But fixing a ruined foundation or a flooded yard costs much more. Choosing a great contractor keeps your project simple and safe.

This guide will help you. It explains what grading workers do, how to choose the best team, what it costs, and what to ask before they start.

I am Don Larsen, the head of Saga Infrastructure. We partner with great local construction teams across the country. I know what makes a grading contractor great, and I want to share that with you.

Infographic showing 5 steps to hire a land grading contractor: verify license and insurance, check reviews and portfolio

Useful links to learn more:

How to Choose the Best Land Grading Contractors Near Me

Contractor evaluating land grading site with laser level

When you look for land grading contractors near me, you are not just hiring someone to move dirt. You are hiring a pro to shape the ground under your home. Whether you live in Florida, Arizona, or Texas, you need the right team.

First, make sure the contractor has these important things:

  • A State License: This proves they know how to do the work safely and legally.
  • Liability Insurance: This pays for repairs if they accidentally break a fence or a pipe.
  • Worker’s Comp: This protects you if a worker gets hurt on your property.
  • Knowledge of Local Rules: They must know how to move water without flooding your neighbor’s yard.

To see how grading fits into building a home, read The 5 Best Site Preparation Contractors Compared.

Key Qualifications to Look For

Moving dirt is a hard skill to learn. Look for these things when you hire a team:

  • Lots of Experience: Look for companies that have worked in your area for many years.
  • A Photo Portfolio: Ask to see pictures of their past jobs. A good yard leveling contractor will be happy to show you.
  • Good Reviews: Read online reviews to see if they show up on time and do a good job.
  • A Written Warranty: Ask if they will come back to fix the dirt if it sinks later.

For more tips on preparing your yard, read Leveling Up Your Landscape Without the Heavy Lifting.

Local Factors and Regional Soil Considerations

Different places have different types of dirt. Your contractor must know how to handle your local soil:

  • Florida: The soil here is very sandy. Sand drains fast but washes away easily. Workers must plant grass or sod quickly to keep the sand in place.
  • Texas: Many areas have clay soil. Clay swells up when wet and shrinks when dry. This can crack home foundations. Workers must shape the land carefully to keep water away.
  • Arizona: The ground here is dry and hard. It often has a rock-like layer called caliche. Workers must use heavy machines to break through it.

Knowing your soil is a big part of site prep. Learn more by reading Why Site Prep for House Construction Is Your Most Important Step.

Core Services and Grading Types Explained

Heavy machinery and excavator grading residential land

Professional land grading contractors near me do many different jobs. They do not just flatten lawns. They prepare land for building, fix water flow, and stop soil from washing away.

To learn the basics, read The Straight Dirt on Land Grading and Leveling.

What Services Do Land Grading Contractors Near Me Offer?

A professional grading team can help you with these tasks:

  • Clearing Land: Removing trees, bushes, and plants to make a clean space.
  • Stump Grinding: Chewing up tree stumps and roots so they do not rot and leave holes later.
  • Driveway Grading: Making a smooth, hard base for gravel, asphalt, or concrete. Read more in From Dirt to Driveway: Mastering Grading and Paving.
  • Building Pads: Making a flat, hard dirt pad for a new home or shed.
  • Erosion Control: Building dirt mounds and ditches to stop rain from washing your soil away.

Rough Grading vs. Fine Grading vs. Resloping

Grading has different steps. Your contractor will use different tools for each step:

Grading Type What It Does Common Equipment Used When You Need It
Rough Grading Moves lots of dirt to shape the land. Bulldozers, large excavators Starting a new build or reshaping a big yard
Fine Grading Makes the top layer of dirt smooth and removes rocks. Skid steers, laser levels Preparing for grass seed, sod, or concrete
Resloping Changes the angle of a hill to guide water away. Small excavators, skid steers Fixing wet yards and stopping basement floods

Understanding Land Grading and Yard Leveling Costs

Before you call land grading contractors near me, it helps to know how they price their work.

To see a full breakdown of prices, read How Much Does Land Grading Cost?.

Key Cost Factors and National Averages

Most yard grading projects cost between $1,216 and $4,356. Your price will depend on these things:

  • Yard Size: Big yards cost more to grade than small yards.
  • Slope: Steep hills take more time and work to level.
  • Access: If gates or trees block big machines, workers must use smaller tools. This takes longer and costs more.
  • Extra Dirt: If you have low spots, you must pay to bring in extra dirt.
  • Clearing Trees: Clearing trees and brush on a large lot can cost $6,000 per acre or more.

To learn more about these early costs, read How Much Does Site Prep Really Cost?. If you live in Texas, you can check Thumbtack’s Houston Grading Contractors to compare local prices.

DIY vs. Professional Land Grading

It might seem easy to rent a machine and grade your own yard. But doing it yourself can cause big problems:

  • Danger: Driving heavy machines on hills is dangerous if you do not have training.
  • Water Mistakes: If you slope the dirt toward your house by mistake, you can flood your basement. This costs a lot of money to fix.
  • Hidden Pipes: If you dig without checking, you could hit gas, water, or power lines.
  • Rental Costs: Renting machines and buying dirt can cost almost as much as hiring a pro.

Hiring a pro saves you time and protects your home. Learn more in The Groundwork Essentials for Your New Construction Project.

How Proper Grading Protects Your Property and Improves Drainage

The main goal of grading is to control water. When it rains, water flows downhill. If your yard is not shaped right, water will pool and damage your home.

To see how these systems work, read The Essential Guide to Grading and Drainage Systems.

Preventing Erosion and Foundation Damage

Good grading protects your home in these ways:

  • Foundation Protection: Water must flow away from your house. Workers make the ground slope down six inches over the first ten feet from your walls.
  • Stopping Erosion: Rain can wash away your good dirt. Grading, dirt mounds, and grassy ditches slow down the water and keep your soil in place.
  • No More Puddles: Standing water brings mosquitoes and kills your grass. Good grading makes water drain away.
  • French Drains: If your soil does not drain well, workers can bury a pipe in a gravel trench to carry water away.

If you are building a business site, read our checklist in Ready, Set, Build: A Complete Checklist for Commercial Site Preparation.

Professional Equipment and Timelines

Pros use special tools to get the job done right:

  • Excavators and Dozers: These move huge piles of dirt.
  • Skid Steers: These small machines smooth out tight spaces.
  • Lasers and GPS: These tools help workers make perfect slopes.
  • Rollers: These pack the dirt down tight so it does not sink later.

Most home grading projects take 1 to 3 days. Large business sites can take a few weeks.

Frequently Asked Questions About Land Grading

Key Questions to Ask Land Grading Contractors Near Me Before Hiring

Ask these questions before you hire a contractor:

  1. Are you licensed and insured in our state? (Always check this yourself).
  2. Does your price include all labor, dirt, and permits? (Get this in writing).
  3. Will you call 811 to mark utility lines before you dig? (This is required by law to keep you safe).
  4. How will you make the water drain safely? (They should explain where the water will go).
  5. Do you promise to fix the dirt if it sinks later? (A good contractor will fix settling issues).

How Long Does a Typical Grading Project Take?

Most home yards take 1 to 3 days to grade. If the workers have to clear trees or bring in lots of dirt, it can take 4 to 7 days. Heavy rain can cause delays because machines cannot work in wet mud.

What Are the Risks of DIY Yard Leveling?

The biggest risks are bad water drainage and hitting underground pipes. If you slope the yard toward your house, you can flood your foundation. If you do not call 811 before you dig, you could hit a gas or power line. This is very dangerous and costs a lot of money to fix.

Conclusion

At Saga Infrastructure, we know that great buildings start with a strong foundation. We partner with top local construction teams in Florida, Texas, and Arizona.

We keep local brands and trusted teams in place. Then, we help them grow with national resources, safety tools, and funding.

Whether you are building a new neighborhood or just need to prep a site, we are here to help.

If you own a construction business and want to protect your legacy, let’s start the conversation.

Categories
Blog

Local Site Prep from Florida Swamps to Arizona Deserts

Local Site Prep from Florida Swamps to Arizona Deserts

Local Site Prep from Florida Swamps to Arizona Deserts

Why Land Clearing Services in Florida Demand Local Expertise

Land clearing services in Florida do a lot more than cut down trees. If you need to prep a lot, here is a quick guide to help you understand the basics:

Quick-start guide for Florida site prep:

  • Forestry mulching — the cheapest way; it grinds plants into mulch on the ground
  • Brush and underbrush removal — clears thick weeds for homes and businesses
  • Stump grinding and root raking — pulls up roots so the dirt stays flat and strong
  • Site grading and preparation — shapes the land so water drains away
  • Debris hauling — takes trash away when mulching is not used
  • Permits — papers you need from the city to clear land near water or big trees
  • Typical cost range — $1,500 to $15,000+ depending on size and how many trees there are

Florida is growing fast. Lots of people are moving here, so builders need clear land. But Florida land is tough. It has thick plants, deep roots, wet sand, and strict rules.

If you hire the wrong helper, you could get fined or end up with a muddy mess.

I am Don Larsen, the head of Saga Infrastructure. We work with top local teams who clear land across Florida. I know what makes a great contractor. Below, I will explain how to get your land ready the right way.
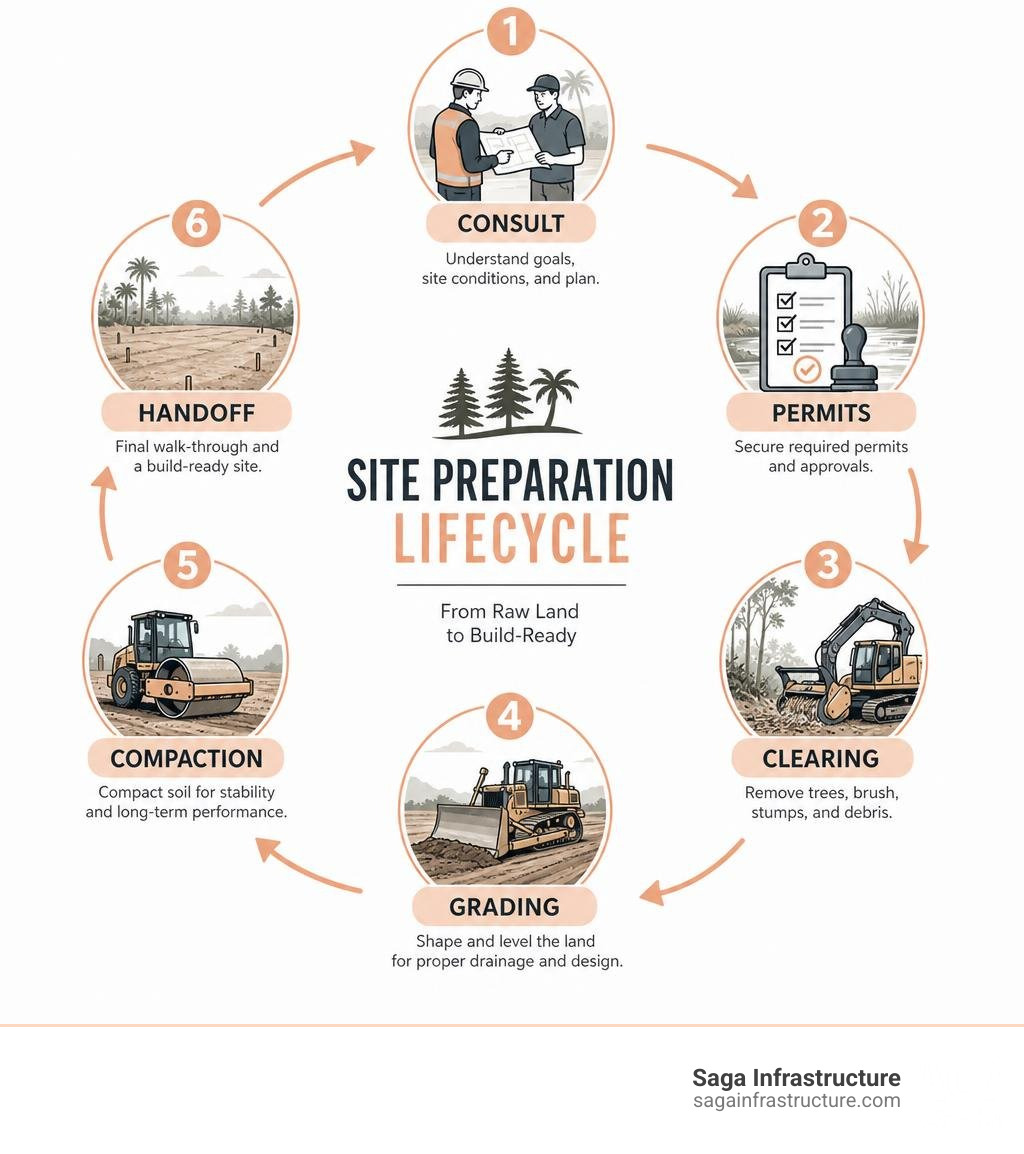
Site preparation lifecycle infographic: consult, permits, clearing, grading, compaction, handoff infographic

Easy land clearing services Florida glossary:

Core Types of Land Clearing Services Florida Property Owners Need

When you look for land clearing services in Florida, you will find that “clearing” is not just one simple job. It takes many steps to turn wild woods into flat, safe ground.

Whether you have a small yard in Minneola or many acres in Clermont, you must pick the right service. If you want to learn how to find a good team, read The Ultimate Guide to Locating Top-Rated Land Clearing Services.
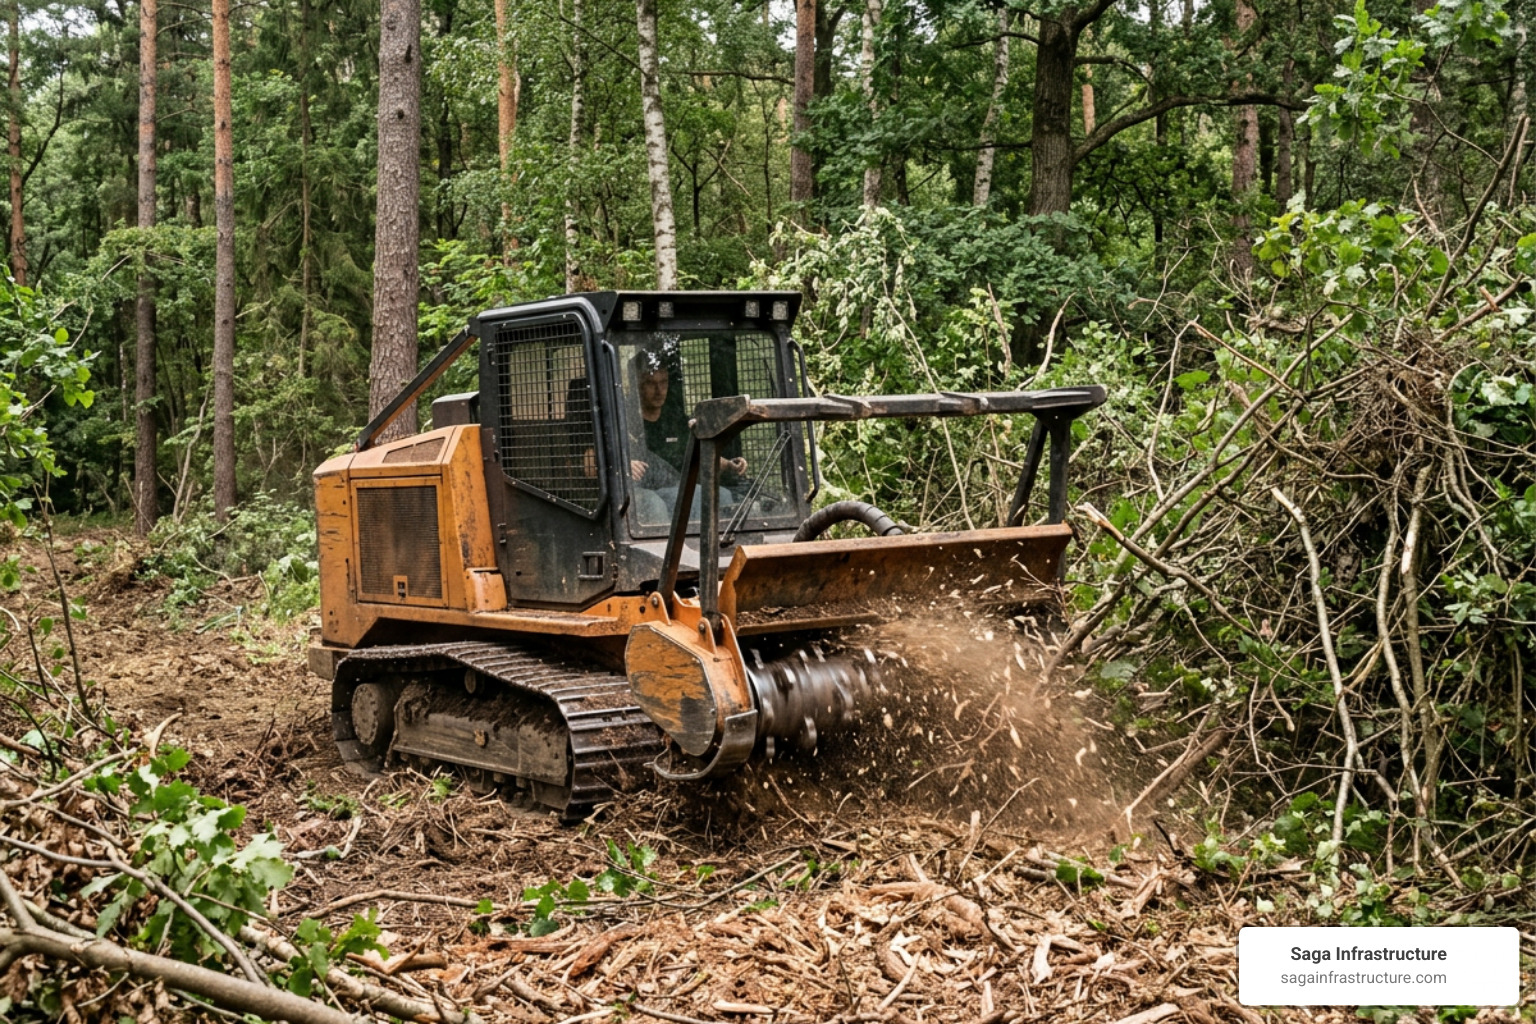
forestry mulcher clearing thick underbrush

Here are the main services you will see:

  • Forestry Mulching: A big machine cuts and grinds plants all at once. It leaves a nice layer of mulch on the ground.
  • Brush Removal: This cleans out thick weeds, vines, and small bushes.
  • Stump Grinding and Removal: This gets rid of tree stumps so they do not rot under your house or attract bugs.
  • Root Raking: Heavy tractors pull up roots from under the dirt so the ground can be packed down tight.
  • Site Grubbing: This is a deep clean that removes buried logs and roots so the ground stays strong.

Forestry Mulching and Brush Removal

Forestry mulching is a great choice for many landowners. Old ways of clearing used big bulldozers to push trees into giant piles. Then, workers had to burn the piles or haul them away in loud trucks.

Forestry mulching is much easier. A special machine grinds trees and bushes into fine mulch right where they stand.

This method has many benefits:

  • Helps the Soil: The mulch covers the ground and rots slowly, which feeds the sandy Florida soil.
  • Stops Erosion: Florida gets heavy rain. Mulch keeps the dirt from washing away in storms.
  • Prevents Wildfires: Florida has many fires every year. Clearing dry brush helps protect your home from fire.
  • Saves Money: You do not have to pay trucks to haul away the wood.

To see how these steps help communities grow, read How Site Development Companies Build Our World.

Grading, Leveling, and Site Preparation

After clearing the plants, the dirt work begins. You cannot build a house on bumpy, soft ground. You must grade and level the site first.

Florida looks flat, but that can trick you. Because it is so flat, water does not always flow away. Heavy rains can cause big puddles or flood your home if the dirt is not sloped correctly.

Good site prep includes:

  • Rough Grading: Shaping the dirt so rainwater flows away from your building.
  • Soil Compaction: Pressing the dirt down hard so it can hold heavy concrete.
  • Final Leveling: Making the top dirt smooth so builders can start their work.

To learn more about this step, read The Straight Dirt on Land Grading and Leveling.

Why Professional Land Clearing Services Florida Outperform DIY

It might seem easy to rent a small tractor and clear the land yourself. But doing it alone can lead to broken tools, bad mistakes, and big fines.

Professional land clearing services in Florida use huge, strong machines. They can clear in one afternoon what would take you weeks to do by hand.

Also, pros know how to stay safe. Florida woods have falling trees, hidden holes, and wild animals.

A pro crew keeps your project on time and safe. To see why this step is so important, read Why Site Prep for House Construction is Your Most Important Step.

Key Factors That Influence Florida Site Prep Costs

Planning your budget is very important. In Florida, clearing a lot usually costs between $1,500 and $15,000+ depending on the land.
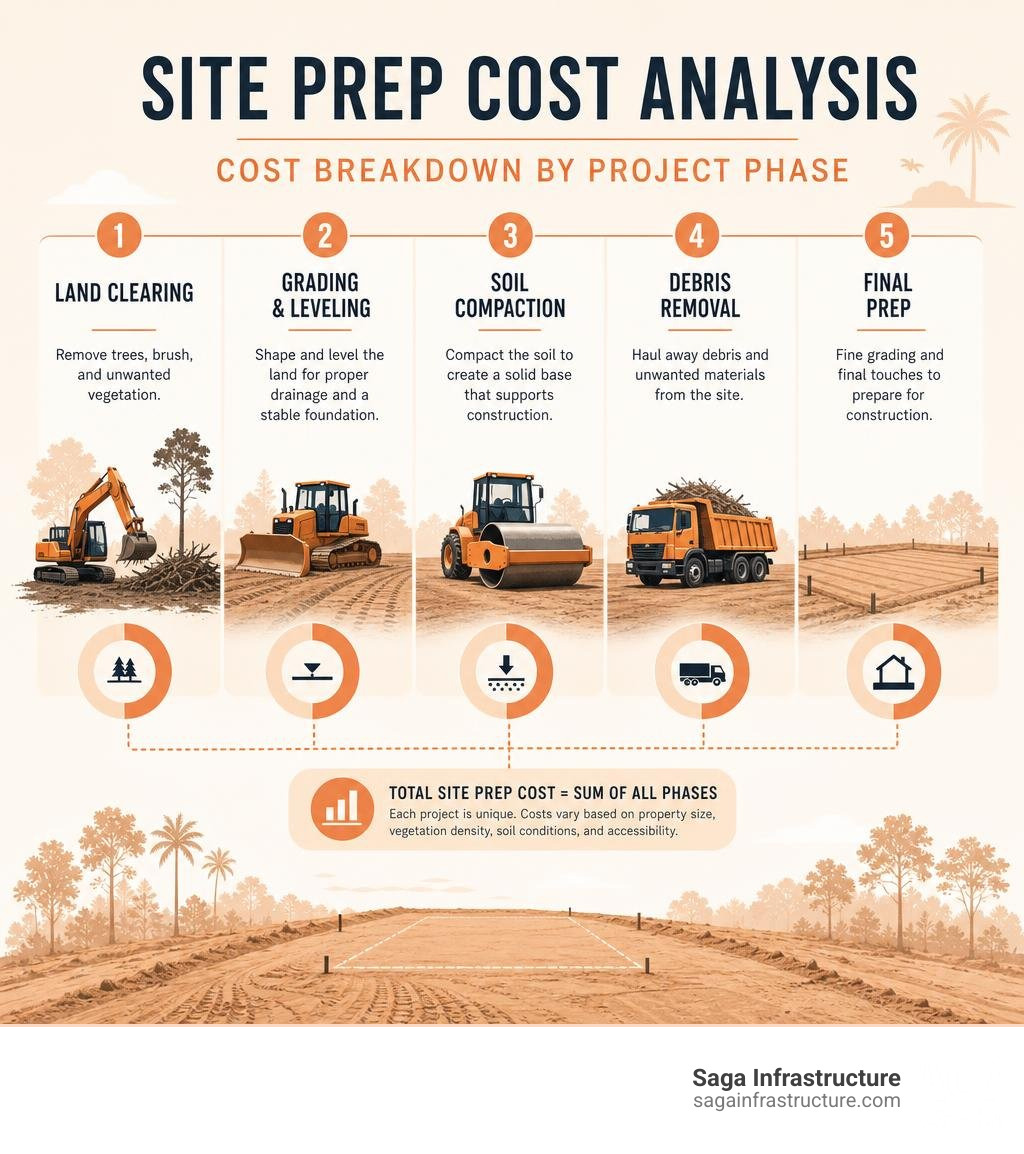
Site prep cost analysis chart showing cost breakdown by project phase infographic

Here are the main things that change the price:

  • Size: Clearing a small yard is much faster and cheaper than clearing a huge field.
  • Plants: A grassy field is easy to clear. A thick forest with big trees takes much more work.
  • Access: If trucks can drive right onto your land, it costs less. If the path is narrow or muddy, it costs more.
  • Cleanup: Leaving mulch on the ground is cheap. Hauling all the wood away in dump trucks costs more.

Here is a simple guide to help you estimate costs:

Plant Density Cost Per Acre (Light Clearing) Cost Per Acre (Heavy Clearing & Grubbing)
Light (Grass and small weeds) $1,500 – $3,000 $3,000 – $4,500
Medium (Thick brush and small trees) $3,000 – $5,500 $5,500 – $8,000
Heavy (Dense forest and big stumps) $5,500 – $9,000 $9,000 – $15,000+

To learn more about these costs, read How Much Does Site Prep Really Cost?.

Regional Cost Variations Across Florida Counties

Where your land is located also changes the price. Different parts of Florida have different dirt, trees, and dump fees.

  • Central Florida (Lake, Orange, Osceola Counties): This area has sandy hills and big oak trees. Lots of clearing happens here near Minneola and Clermont.
  • Southwest Florida (Lee, Charlotte, Collier Counties): This area is very flat and wet. Trucks need special tracks so they do not sink into the mud.
  • Northeast Florida (Putnam, Flagler, St. Johns Counties): This area has thick pine forests and very old oak trees.

To learn more about grading costs, read How Much Does Land Grading Cost?.

Comparing Florida Swamps to Arizona Deserts

Saga Infrastructure works in many states, like Florida, Texas, and Arizona. It is neat to see how site prep changes in different places.

In Florida, our biggest problems are water and thick plants. We deal with wet sand and deep roots that we must pull out of the ground.

In Arizona, the desert is very different. There is no mud. Instead, the ground has a rock-hard layer of clay called caliche. It is as hard as concrete. Workers must use heavy hammers to break it apart instead of rakes.

Texas has a mix of both. Some parts have thick brush, and other parts have rocky clay.

No matter where you are, you must use the right tools for the local dirt.

Florida is beautiful, and the state protects its nature. This means you cannot just drive a bulldozer onto a lot and start knocking down trees. You must follow the rules first.

silt fencing installed for erosion control

Before you start, you must check three sets of rules:

  1. City Rules: Cities often have strict laws about saving big trees.
  2. County Rules: Counties control how you use and shape your land.
  3. Water Districts: State groups protect wetlands and clean water.

To make sure your project follows all the rules, read the Ready, Set, Build: A Complete Checklist for Commercial Site Preparation.

When Do You Need Permits for Land Clearing Services Florida Projects?

You will almost always need a permit to clear land if you plan to build.

Florida counties protect certain trees. Big live oaks and cypress trees are highly protected. If you cut them down without permission, you can be fined thousands of dollars per tree. A good contractor will tell you which trees you can cut and which ones you must save.

Protecting Wetlands and Native Wildlife

Florida has fragile nature. If your land is near water, you must leave a green buffer zone. This stops mud from washing into the water. We put up black fabric fences, called silt fences, to keep the dirt in place.

We also protect animals. The gopher tortoise is protected in Florida. They dig deep holes in the ground. Heavy tractors can crush their homes.

If a tortoise lives on your land, a special helper must safely move it before we can clear the ground. You can learn more about these rules from the Florida Fish and Wildlife Conservation Commission.

Choosing a Licensed and Insured Contractor

Some people offer cheap clearing services but do not have licenses or insurance. Hiring them is a big risk. If they break a pipe or get hurt on your land, you might have to pay for it.

Always check these things before you hire a helper:

  • Sunbiz Registration: Make sure the business is registered in Florida on Sunbiz.
  • Liability Insurance: This covers damage to property.
  • Worker’s Comp: This pays if a worker gets hurt on your land.
  • Good Reviews: Look for a team with a good reputation in your town.

To learn more about hiring a great team, read From Ground Up: Everything You Need to Know About Earthwork Construction Companies.

Frequently Asked Questions About Florida Site Prep

Preparing your land can feel hard. Here are simple answers to common questions about Florida site prep.

How long does a typical land clearing project take in Florida?

For a normal yard under one acre, a pro crew can clear and level the land in 1 to 3 days. Larger jobs or thick forests can take 4 to 7 days or more.

Rainy summer days and waiting for city permits are the main things that can slow down the work.

What is the difference between land clearing and grubbing?

  • Land Clearing means cutting down trees and clearing bushes on top of the ground.
  • Grubbing means digging deep to pull out roots and stumps from under the dirt.

You must do grubbing if you want to pour concrete. If you leave roots in the dirt, they will rot and make the ground sink, which cracks your foundation.

Can land clearing help reduce wildfire risks on my property?

Yes, it can. Overgrown land has lots of dry leaves, dead wood, and weeds. This stuff burns very fast.

Using a mulcher to clear this brush creates a safe space around your home. This helps stop fires from reaching your house.

Conclusion

Every good building needs a strong start. Whether you are building a new home in Minneola or a business on the coast, hiring professional land clearing services in Florida is your first step. To make sure your build goes well, read The Groundwork Essentials for Your New Construction Project.

At Saga Infrastructure, we help local builders who know their towns best.

We combine local pride with national strength. We partner with great local teams, like Foshee Construction in Minneola, Florida, and RBC Utilities in North Carolina. We give them tools and support while keeping their local names and teams.

Kevin and Cindi Foshee, the founders of Foshee Construction, said:

“When we wanted to sell our business, we wanted a partner who cared about our team. Saga was perfect. They respected our workers and made the process very easy.”

We bring that same care and quality to every job. If you are ready to clear your land, let’s talk. Visit us at Saga Infrastructure to see how we can help you with your next project.

Categories
Blog

How Much Does Site Prep Really Cost

How Much Does Site Prep Really Cost

How Much Does Site Prep Really Cost

What Does Site Prep Really Cost Per Square Foot?

Preparing your land for building usually costs $1.50 to $5.00 per square foot. Most people pay about $3.80 per square foot in 2026. Here is a quick look at the costs:

  • Flat, clean lot with utilities nearby: $1.50 to $2.50 per sq. ft., or about $10,000 to $20,000 total.
  • Normal yard: $2.50 to $4.00 per sq. ft., or about $15,000 to $35,000 total.
  • Sloped lot with lots of trees and no utilities: $4.00 to $7.00+ per sq. ft., or about $40,000 to $70,000+ total.
  • Rocky or very hard land: $5.00 to $10.00+ per sq. ft., or about $50,000+ total.

These prices can change fast. It depends on your soil, trees, and how close you are to power and water.

Many people get surprised by the cost. Builders often do not include site prep in their first price. Removing trees, blasting rocks, and putting in pipes cost extra. One homeowner skipped a $1,500 soil test. Later, they had to spend $18,000 to fix their foundation because the clay soil was bad. That is a huge surprise!

Knowing these costs before you start helps you save money.

My name is Don Larsen. I am the boss at Saga Infrastructure. I have spent my career working on big building projects. I know how to keep site prep costs low. In this guide, I will help you understand these costs so you can plan your project.

Site prep cost per square foot breakdown infographic by lot type and component infographic

Quick links to help you:

Average Site Prep Cost per Square Foot in 2026

When you build a new house, you need to plan your budget. In 2026, preparing a basic yard costs about $3,800. But a full home site usually costs between $15,000 and $35,000. If the land is wild and has no roads or power, it can cost $50,000 to $70,000 or more.

The cost per square foot goes down when the project is bigger. This is because moving big machines to the site costs the same whether the land is small or large.

According to How Much Does Site Preparation Cost? [2026 Data] | Angi, here are the average costs for 2026:

  • Small pad, 1,000 sq. ft.:
    • Easy flat, cleared lot: $1.50 to $2.00 per sq. ft.
    • Moderate lot with some trees or slope: $2.50 to $4.00 per sq. ft.
    • Difficult lot with heavy woods, rock, or slope: $5.00 to $10.00+ per sq. ft.
  • Typical home site, 2,500 sq. ft.:
    • Easy flat, cleared lot: $1.50 to $2.50 per sq. ft.
    • Moderate lot with some trees or slope: $3.00 to $5.00 per sq. ft.
    • Difficult lot with heavy woods, rock, or slope: $6.00 to $12.00+ per sq. ft.
  • Large lot, 1 acre or 43,560 sq. ft.:
    • Easy flat, cleared lot: $0.11 to $0.25 per sq. ft.
    • Moderate lot with some trees or slope: $0.25 to $0.50 per sq. ft.
    • Difficult lot with heavy woods, rock, or slope: $0.60 to $1.50+ per sq. ft.
  • Acreage, 5+ acres:
    • Easy flat, cleared lot: $0.05 to $0.15 per sq. ft.
    • Moderate lot with some trees or slope: $0.15 to $0.35 per sq. ft.
    • Difficult lot with heavy woods, rock, or slope: $0.40 to $1.00+ per sq. ft.

Preparing a small yard might cost more per square foot than a huge field. But the total cost for a big field is still much higher because there is so much more land to clear.

Key Components of Site Preparation and Their Costs

Site prep is not just one job. It is a list of steps to make wild land ready for a building. If you skip a step, your building could crack or sink later.

To see where your money goes, you can read The Groundwork Essentials for Your New Construction Project. The work usually goes in this order:

  1. Clearing the Land: Taking away trees, bushes, and roots.
  2. Digging and Moving Dirt: Shifting dirt to make the ground flat.
  3. Grading: Making the ground slope slightly so water flows away from the building.
  4. Packing the Soil: Pressing the dirt down hard so it can hold a heavy building.

Let us look at each step and what it costs.

Land Clearing and Tree Removal Costs

Before tractors can flatten the ground, we must clear the plants. Clearing land usually costs $5,000 to $11,000 per acre. That is about $0.11 to $0.25 per square foot.

If there are many trees, it costs more. According to How Much Does Site Prep Cost Before Building a House? (2026 Breakdown) – BuildWithEmil, removing trees for a normal home costs $1,500 to $6,000.

You also have to pull out the tree stumps and roots. This is called “grubbing.” If you leave roots in the dirt, they will rot. This leaves empty holes under the ground. Then, the ground sinks and cracks your house. Grubbing can cost $5,000 to $15,000, but it is very important.

Excavation, Grading, and Compaction Site Prep Cost per Square Foot

After clearing, we move the dirt. We want the ground flat where the house goes, and sloped elsewhere so rain runs away.

You can learn more about this in The Straight Dirt on Land Grading and Leveling. Here are the costs:

  • Digging (Excavation): Costs $0.50 to $2.00 per square foot. This is for digging the hole for the foundation.
  • Leveling (Grading): Costs about $0.06 to $0.11 per square foot.
  • Packing (Compaction): Costs $0.20 to $0.50 per square foot.

Workers use big machines to scoop dirt from high spots and dump it in low spots. Then, they roll heavy machines over the dirt to pack it tight. This keeps the house from shifting.

Concrete Slab Site Prep Cost per Square Foot

If you are building on a flat concrete floor, the prep work must be very neat. You cannot just pour concrete on loose dirt.

According to Concrete Slab Site Prep Cost 2026: $1 to $5 Per Square Foot | concreteslabcost.com, preparing the ground for a concrete floor costs $1.00 to $5.00 per square foot. This work includes:

  • Digging the Hole: Digging down 6 to 12 inches.
  • Adding Gravel: Putting down 4 to 6 inches of crushed stone. This costs $0.50 to $1.50 per square foot. It stops water from rising into the concrete.
  • Plastic Barrier: Laying down thick plastic sheeting. This costs $0.10 to $0.40 per square foot. It keeps the floor dry and stops mold.
  • Final Packing: Making sure the gravel and dirt are locked tight.

Skipping these steps to save money is a bad idea. Fixing a cracked floor later can cost ten times more than doing it right the first time.

Environmental, Utility, and Lot Condition Cost Drivers

Now let us talk about other things that can change your costs.

utility trenching for site preparation on residential lot

These factors are hard to see at first, but they can make your site prep cost much more.

Soil Testing, Erosion Control, and Drainage Systems

Before big trucks start, you must test the soil. A soil test costs $500 to $2,500. It tells you if your soil is sandy, rocky, or full of sticky clay.

When it rains, you must stop mud from washing away. Special fences and gravel paths help keep the dirt on your lot. These cost $1,000 to $4,000. You can read more in our Step-by-Step Guide to Erosion Control Solutions.

You might also need pipes to carry water away. These are called French drains. They cost $4 to $10 per foot. They protect your house from water damage.

Utility Connections and Site Access

If your land is wild, you need to bring in power, water, and sewer. This costs $20 to $120 per foot.

If the pipes are close to your house, it might cost $10,000 to $25,000. But if your house is far from the road, it can cost $30,000 to $50,000 or more.

You also need a road for heavy trucks to drive on. A temporary gravel road costs $2,000 to $12,000. Read more about this in our guide: Ready Set Build: A Complete Checklist for Commercial Site Preparation.

Flat and Cleared vs. Sloped and Wooded Lots

The shape of your land matters a lot.

sloped rocky terrain site preparation and grading work

A flat, clean lot with power nearby is the best. Preparing this land is easy and costs $10,000 to $20,000.

But a steep, woody lot is much harder. You have to cut down trees and move lots of dirt. You might also need to build strong walls to hold back the dirt. These walls cost $20 to $50 per square foot.

Steep hills also change how you build your house. You might need a basement instead of a flat concrete floor. This costs more money. To see why these choices matter, read Why Site Prep for House Construction Is Your Most Important Step.

Regional Cost Variations Across the US

Where you build changes the price. Labor and materials cost different amounts in different states. Saga Infrastructure works in several fast-growing states. Here is how the location affects costs:

  • Florida (Minneola, Clermont): Florida has sandy soil. It is very easy to dig. But Florida is flat and wet. You must spend more money to keep water away from your house.
  • Texas: Texas has clay soil. Clay swells up when wet and shrinks when dry. This can crack a house. You need special soil tests and strong foundations here.
  • Arizona: Arizona is dry, but the ground is very rocky. Digging through hard rock requires special, expensive tools.

According to US Construction Costs by State: 2026 Guide & Pricing – 247Pro, knowing your local soil helps you avoid big surprises.

Frequently Asked Questions About Site Prep Costs

Here are answers to common questions about preparing your land.

How much extra money should I save for surprises?

You should save 15% to 20% extra money just for site prep.

When you dig underground, you never know what you will find. Workers might find buried trash, old pipes, water, or huge rocks. Having extra money ready means your project will not have to stop.

Does the builder’s price include site prep?

Usually, no. This is a mistake many people make.

Most builders will flatten the dirt at the very end. But they do not pay to clear trees, blast rocks, or bring in power lines. Always read your contract carefully. Ask your builder what is included and what you have to pay for yourself.

How long does site prep take?

For a normal, flat lot, site prep takes 1 to 3 weeks.

If you have lots of trees, rocks, or need long pipes, it can take 4 to 6 weeks. Bad weather can also slow things down. Heavy rain turns dirt into mud, and you cannot work on muddy ground.

Conclusion

At Saga Infrastructure, we know that a good building needs a strong start. We partner with great local construction companies, like Foshee Construction in Minneola, Florida. We give them the money and tools they need to grow, while keeping the local names and teams you already trust.

Whether you are building a house, a store, or putting in utility pipes, knowing your site prep cost per square foot is the first step. Working with local experts who know your soil and weather will help you start on solid ground.

Do you own a construction business and want to plan for the future? Or are you starting a big building project and need a partner you can trust?

Let us talk. Visit us at Saga Infrastructure today to see how we can build the future together.

Categories
Blog

Your Local Guide to Finding As Built Survey Services

Your Local Guide to Finding As Built Survey Services

Your Local Guide to Finding As Built Survey Services

What You Need to Know Before Searching for an As-Built Survey Near Me

Finding a good as built survey near me is very important. You need one before you finish building, get a permit to move in, or start a remodel.

Here is a quick guide:

  • What is it? A map showing what was actually built compared to the plans
  • Who needs one? Builders, contractors, and property owners
  • When is it needed? To get a Certificate of Occupancy or close out a project
  • What does it cost? Often $500 to $2,500+, depending on project size
  • How long does it take? Usually 5 to 10 business days
  • Who does it? A licensed land surveyor

Most cities require this survey before you can use your new building. Without it, your project cannot finish. That delay can cost you money.

This guide will help you find a local surveyor, ask the right questions, and understand the cost.

I am Don Larsen, CEO of Saga Infrastructure. I have worked in construction for a long time. I know how important accurate maps are. They keep projects on time and safe. At Saga, we help you find the best as built survey near me so your project closes out smoothly.

Steps to find and hire a local as-built survey provider with cost and timeline overview infographic

Key terms for as built survey near me:

What is an As-Built Survey and Why Do You Need One?

completed commercial building with survey overlays

An as-built survey is a detailed map of a property. It shows everything built on the land. A design plan shows what should be built. But this survey shows what actually exists right now in June 2026.

When you build a house or a store, things can change. Workers might have to move a wall, a pipe, or a driveway because of trees or rocks. An as-built survey shows these exact changes. It shows where they are compared to the property lines.

This survey proves that everything was built in the right spot. It also shows that you followed local rules. To learn more, read Why Your Project Needs As-Built Survey Services Right Now.

How As-Built Surveys Differ from Boundary Surveys

These two surveys do different things:

  • Boundary Surveys: These only find and mark the edges of your land. They show where your property starts and ends. They do not show every pipe or building. You can learn more in Everything You Need to Know About a General Boundary Survey.
  • As-Built Surveys: These show much more. They show the building, driveways, parking spots, and utility poles. They prove your new building does not cross onto your neighbor’s land.

If you have a very large property, you might need an ALTA survey. Read Demystifying the ALTA Survey for Real Estate Professionals to see how they work.

When to Order an As Built Survey Near Me

You will need to search for an as built survey near me at these times:

  1. City Inspections: Cities like Minneola and Clermont, Florida, need these surveys to check if your building follows local laws.
  2. Certificate of Occupancy (CO): You cannot live or work in a new building without this paper. Cities want to see the survey before they give you a CO.
  3. Finishing a Project: Banks and builders need this survey to make final payments and close the project.
  4. Fixing Old Permits: If someone built something in the past without a permit, the city will want a survey to check it now.

Key Details Included in a Professional As-Built Survey

2D CAD drawing of a building floor plan

A professional as-built survey is not just a simple drawing. It is a very exact map. It has a lot of important information.

A standard survey shows:

  • Buildings: The exact size, height, and location of all structures.
  • Utilities: Pipes and wires for water, gas, and electricity.
  • Pavement: Driveways, sidewalks, and parking lots.
  • Ground Slopes: How the land curves. This proves that rainwater flows away from buildings so they do not flood.

You can get your survey as a flat 2D drawing or a 3D model. Here is how they compare:

  • Best for:

    • 2D CAD drawings: Simple permits and home projects
    • 3D BIM models: Large buildings and complex engineering
  • Format:

    • 2D CAD drawings: PDF and DWG files
    • 3D BIM models: Revit or SketchUp files
  • Accuracy:

    • 2D CAD drawings: High, often within a few millimeters
    • 3D BIM models: Extremely high, with detailed 3D documentation
  • Details included:

    • 2D CAD drawings: Flat floor plans and site layouts
    • 3D BIM models: Full 3D digital model of the building

The Role of 3D Laser Scanning and Modern Technology

Surveying has changed a lot. Today, surveyors use cool tools like 3D laser scanners.

Instead of using a tape measure, the surveyor uses a laser. The scanner spins and shoots millions of light beams. This creates a “point cloud.” A point cloud is a huge group of dots in 3D space.

This point cloud makes a perfect digital copy of the building. This helps prevent mistakes during a remodel. To learn more about these tools, read The Ultimate Guide to Modern GPS Land Surveying Techniques.

How to Choose the Right As Built Survey Near Me

When you look for an as built survey near me, make sure you hire a licensed professional. Not just anyone can do this work.

In states like Florida, Texas, and Arizona, only a licensed land surveyor can sign these maps.

Here is what to look for:

  • Active License: Make sure they are licensed in your state. If your project is in Clermont or Minneola, they must have a Florida license.
  • Local Knowledge: A local surveyor knows the rules of your city or county.
  • Insurance: This protects you if the surveyor makes a mistake.

Key Questions to Ask an As Built Survey Near Me Provider

Before you hire a surveyor, ask them these questions:

  1. How long will it take? (Make sure they can finish on time.)
  2. Does the price include the final digital files? (Some companies charge extra for these.)
  3. Have you worked with my city before? (Knowing local workers can speed things up.)
  4. What tools do you use? (Ask if they use 3D laser scanners if you need a lot of detail.)

Asking these questions helps you avoid mistakes. You can read about other common mistakes in 5 Common Myths About Land Surveying Services.

Frequently Asked Questions About As-Built Surveys

Here are simple answers to the most common questions about these surveys.

How much does an as-built survey cost?

Usually, it costs between $500 and $2,500+.

The price depends on how big and complex your project is. A small home project costs less. A large store or factory costs much more.

How long does it take to complete an as-built survey?

It usually takes 5 to 10 business days.

First, a crew visits your property to measure everything. This takes a few hours. Next, the surveyor draws the map on a computer. This takes a few days.

What is the difference between an as-built survey and a final inspection?

  • Final Inspection: A city inspector walks through your building. They check if it is safe to use.
  • As-Built Survey: A licensed surveyor measures the building exactly. The city inspector often uses this survey map to approve the final inspection!

Conclusion

When you need an as built survey near me, you want a team you can trust. You need someone who knows your local area.

At Saga Infrastructure, we work with top local firms. For example, we partner with Foshee Construction in Minneola, Florida. This means you get friendly, local service backed by a strong national network.

We can help you close out your project in Texas, Arizona, Florida, or anywhere else.

Ready to get your survey? Let’s start the conversation today.

Categories
Blog

Why Your Project Needs As-Built Survey Services Right Now

Why Your Project Needs As-Built Survey Services Right Now

Why Your Project Needs As-Built Survey Services Right Now

When Plans Change, As-Built Survey Services Keep Your Project on Track

As-built survey services are very important for building projects. They are like a final report card for construction.

Here is a quick summary of what they are and why they matter:

  • What they are: A map of what was actually built, not just what was planned
  • What they show: Where pipes, walls, and roads ended up
  • Who needs them: Land owners, banks, and city workers
  • When they are done: During and after building is finished
  • Why they matter: They prove you followed the rules and help you plan for the future

When people build things, plans almost always change. Workers might have to move a pipe or change a wall. If you do not write down these changes, you will have to guess where things are later. That can cause big mistakes.

An as-built survey solves this problem. It shows the real truth about the building.

At Saga Infrastructure, we help builders every day. My name is Don Larsen, and I am the CEO of Saga Infrastructure. I have led many big building projects. I have seen projects get delayed and cost too much money because people did not have good maps of their work. Our partners use as-built survey services to make sure their work is done right.

Lifecycle of an as-built survey from construction start to documentation delivery infographic

As-built survey services terms to know:

What is an As-Built Survey?

Think of an as-built survey as the “final draft” of a building project. When workers start building, they use a plan. This plan shows where everything should go. But real life is different. Workers might hit a big rock and have to move a water pipe. Or they might make a room a little bigger.

An as-built survey shows what was actually built. It maps the building exactly as it stands. It shows how far apart things are. It also shows how high or deep they are.

This survey shows the real facts on the ground. If you want to learn about finding the edges of your land, read our guide on Everything You Need to Know About a General Boundary Survey.

How It Differs from Other Land Surveys

Different surveys do different jobs.

A boundary survey finds your property lines. It shows where your land starts and stops. This helps you know where you can build a fence.

An ALTA survey is a very detailed map for buying and selling business land. It shows property lines, rules, and risks. You can learn more in our article Demystifying the ALTA Survey for Real Estate Professionals.

An as-built survey is different. It checks if the building matches the plans and rules. It is done during or after building to prove you did the job right.

Survey Type What It Does What It Shows When You Need It
Boundary Survey Finds land limits Property lines and corners Before buying land or building a fence
ALTA Survey Shows business risks Rules, easements, and lines When buying business property
As-Built Survey Checks actual building Pipes, walls, and heights After pouring concrete or finishing the job

Why Your Project Needs As-Built Survey Services Right Now

renovated commercial building showing modern upgrades

Waiting until the end of a project to get an as-built survey is a bad idea. Using as-built survey services early saves you from big mistakes.

First, it stops accidents. If a worker does not know where a pipe is, they might hit it and break it. An as-built survey shows exactly where the pipes are so you do not break them.

Second, it saves money. When you have exact measurements, you do not buy too much wood or concrete. You buy just what you need.

Third, it stops arguments. If there is a question about where a wall is, you can just look at the survey. This keeps everyone happy and working. To learn more about how this works, read What is As-Built Survey & How to Conduct One Accurately | Matterport .

How As-Built Survey Services Ensure Regulatory Compliance

Cities have strict rules about building. If you break the rules, the city can stop your project. They might even make you tear down your work.

An as-built survey proves to city inspectors that you followed the rules.

For example, buildings must be a certain distance from the street. This is called a setback. If your building is too close to the street, you will get a big fine. An as-built survey proves your building is in the right spot.

Also, utility companies have rights to use parts of your land. This is called an easement. You cannot build over these areas.

In Florida, you must show an as-built survey before you can open your building. Banks in Texas and Arizona also want to see these surveys before they pay the builders. To learn more about the legal rules, check out the As-Built Survey | Legal Glossary – Barnes Walker .

Choosing the Right As-Built Survey Services for Your Project

You need a survey team that knows your local area but has the tools to do big jobs.

Your team must know local rules. Rules in Minneola, Florida are not the same as rules in Houston, Texas.

You also want a partner with great tools. Big projects need fast work and high-tech gear.

Before you hire a team, make sure they understand your project. A small home project is very different from a big city pipe project. To learn about common myths, read our article on the 5 Common Myths About Land Surveying Services.

Key Information Captured in an As-Built Survey

detailed architectural blueprints showing utility lines and elevations

An as-built survey is a very detailed map. It shows every part of a building site. Here is what it captures:

  • Pipes and Wires: It maps water lines, sewers, and power lines. It shows where they are and how deep they are buried.
  • Walls and Columns: It shows the exact spot of every main wall. This makes sure the building is safe.
  • Ground Heights: It measures the height of the ground. This shows where rainwater will flow so the site does not flood.
  • Floor Plans: It shows the inside of the building, like doors and stairs.
  • Ceiling Plans: It shows what is above the ceiling, like lights and air vents.

This information is very important for business buildings. To see how these surveys help with business land, read our guide on Navigating Commercial Real Estate: A Comprehensive Guide to Surveys.

Modern Technology and Digital Tools in Surveying

Surveyors do not just use tape measures anymore. Today, as-built survey services use cool new technology to work fast and get perfect measurements.

One great tool is 3D laser scanning. Instead of measuring one thing at a time, a laser scanner takes millions of measurements in just a few minutes. For example, a special camera called the Matterport Pro3 can scan a room in less than 20 seconds. It is accurate to within a tiny fraction of an inch.

These scans can make a “digital twin.” This is a 3D computer model of the building. It lets people walk through the building on their computer screen.

These scans also help make smart 3D building models. These models show the building’s shape, materials, and pipes all in one place. To see how these tools work, check out The Ultimate Guide to Modern GPS Land Surveying Techniques.

Frequently Asked Questions about As-Built Surveys

When during a project should an as-built survey be conducted?

You should get an as-built survey at a few different times.

The first time is right after you pour the concrete foundation. This proves the building is in the right spot before you build the walls.

The next time is when the whole project is finished. This maps the final building, parking lot, and pipes.

For big projects, you might want surveys done at other steps. This helps check underground pipes before you cover them with dirt.

Who typically requires or requests an as-built survey?

Many people will ask for this survey:

  • City Governments: They want to make sure you followed the building rules.
  • Banks: They want to make sure the building was built right before they pay the final money.
  • Title Companies: They check for land line mistakes when a property is sold.
  • Owners: They want a good map of their property for the future.

How do as-built surveys help with future maintenance and asset management?

An as-built survey is useful for the entire life of the building.

It helps you plan. If you want to move desks or add new machines, you have a perfect map to use.

It helps with repairs. If a pipe breaks in ten years, you do not have to dig up the whole yard. You can look at the survey and find the exact spot of the pipe.

It also helps with remodeling. Architects can design new rooms easily because they have the exact measurements of the old ones.

Conclusion

Building roads and pipes is a big job. It takes hard work and care. At Saga Infrastructure, we want to protect the things that built America. We partner with local builders, like Foshee Construction in Florida. We give them the money and high-tech tools they need to grow, while keeping their local name and history.

By working together, we make sure every road and building is built the right way. Whether you are building in Texas, Arizona, or Florida, as-built survey services will keep your project on track, on budget, and safe.

Let’s talk. If you want to protect your project or learn how we help local builders, visit Saga Infrastructure today.